Creating a project
Now, let's create a project on this cloud. You have two options:
- Using tau-cli (recommended for CLI lovers)
- Using the Web Console (which we'll cover here)
💡 Note: The project creation process remains the same whether you're working in Dreamland (development) or production environments.
Quick Setup Using Web Console
1. Navigate to console.taubyte.com
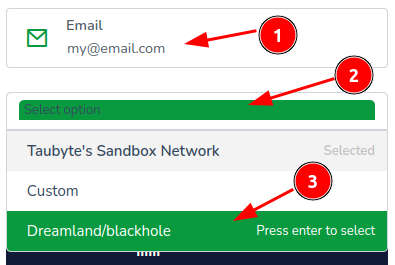
2. Configure your login:
- Enter your email
- Select network:
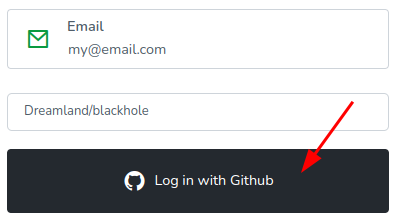
Dreamland/blackhole - Click
Login with GitHub


💡 Note: The GitHub access is browser-local and is used to create project repositories that will be cloned into a browser-based virtual filesystem.
Creating Your Project
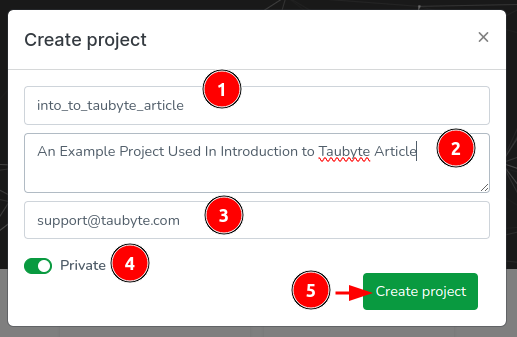
1. From the projects dashboard, click Create project

2. Configure your project:
- Name: your-project-name
- Description: A brief description
- Visibility: private or public if you want open repositories

What Happens Behind the Scenes
The Web Console will create two repositories:
- Config Repository: Contains YAML configuration files
- Code Repository: Contains inline source code in various languages
Upon successful creation, you'll be redirected to the project dashboard:

💡 Pro Tip: If you prefer CLI workflows, check out the tau-cli documentation for command-line project creation.